
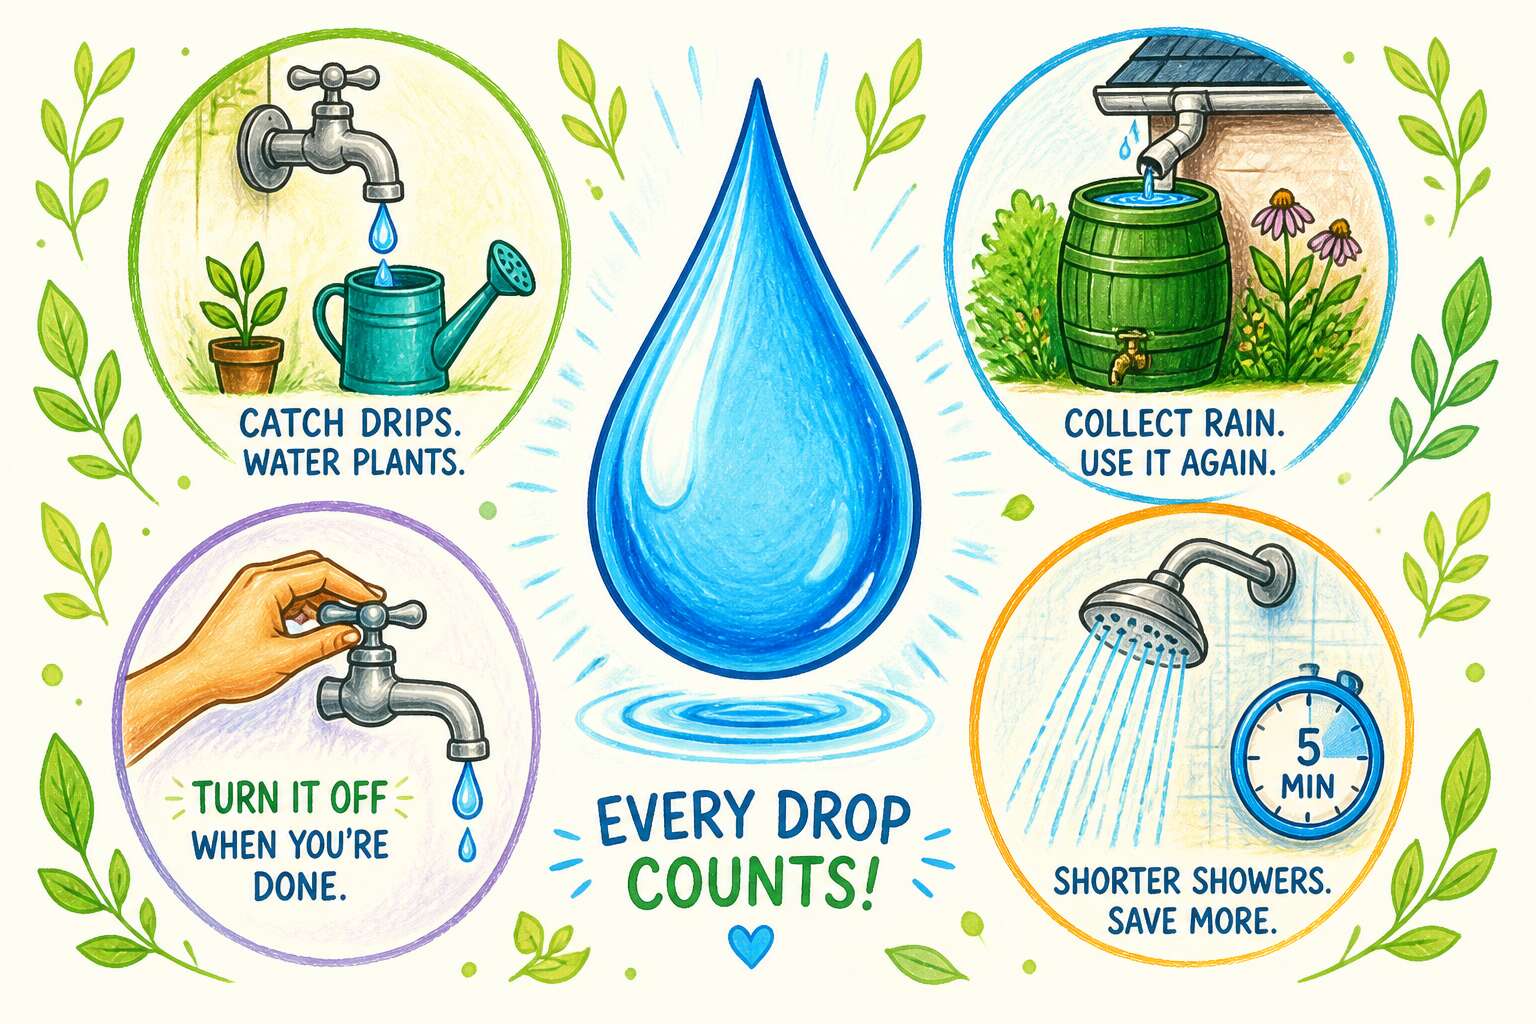
The Power of Visualizing Water Conservation Tips
Improving Message Retention Through Art
The monthly water bill arrives with a sting that has nothing to do with the postal service. In South Africa, where tariffs climb yearly and the Western Cape drought remains a fresh memory, conservation is no longer a choice. Yet, most of us ignore the advice to take shorter showers. Why? Because a pamphlet listing “10 Ways to Save” is forgettable. Numbers and bullet points blur together. A simple drawing, however, sticks. The act of sketching a tap with a drop of water suspended in mid-air changes how the brain processes information. It forces a pause. That pause is where retention begins.
Visualisation works because it condenses complex data into a single, relatable frame. Consider the difference between reading a graph about reservoir levels and seeing a sketch of a cracked earth bed. The latter creates an immediate emotional anchor. For a household looking to cut down on usage, here is a practical way to apply this principle.
- Draw a large, empty bucket on a piece of paper.
- Fill it in with small, distinct droplets each time you finish a washing cycle early.
- Colour the water blue when you collect runoff from the shower to water your garden.
This specific form of water saving tips drawing turns a chore into a visual game. It engages the motor skills, which deepens the memory trace. You are not just reading about saving water; you are participating in a visual record of your own good habits. The result is a tangible sense of progress that a percentage figure on a utility bill can never provide.
For those tasked with educating communities, whether in Johannesburg suburbs or rural Eastern Cape villages, the method is equally potent. A sketch of a brick placed inside a toilet cistern is far more persuasive than a paragraph about displacement volume. The brain decodes images faster than text. It bypasses the need for literacy or translation, speaking directly to shared experience. When a person draws their own version of a saving technique, they take ownership of the idea. That ownership is the engine of lasting behaviour change. It moves the conversation from abstract guilt to concrete action, one line at a time.
Simplifying Complex Data into Visuals
When the monthly water statement arrives, the numbers often fail to shock us into action. The mind skips over figures, treating them as abstract noise rather than urgent reality. Yet a single simple sketch can accomplish what columns of data cannot: it makes our consumption visible, tangible, and personal.
This is where water saving tips drawing becomes a powerful tool. Instead of asking people to remember a long list of dos and don’ts, invite them to create a visual record of their efforts. The act of drawing creates a physical trace, one that connects intention to outcome in a memorable way. Neuroscience supports this: when we draw, we engage multiple regions of the brain simultaneously, encoding the information more deeply than reading alone ever could.
How can this work in a practical home setting? Consider a simple visual journal dedicated to your household’s water use. Each day, you sketch a small icon representing a successful action. The repetitive motion of drawing builds a habit, while the growing collection of images provides visible, cumulative proof of your progress. This approach transforms abstract conservation goals into a concrete, daily ritual.
Here are a few simple visual prompts to get you started:
1. Draw a raindrop for every day you keep showers under five minutes.
2. Sketch a spade or a leaf each time you water plants using collected rainwater.
3. Draw a small tap with a line through it for every sink you fully close after use.
4. Create a small symbol for each full load of laundry you wait for instead of washing a partial one.
The beauty of this method lies in its accessibility. Anyone can participate, regardless of artistic skill. The goal is not to create a masterpiece, but to forge a connection. A stick figure with a bucket does the job just as well as a detailed watercolor. The simplicity is the point.
Over time, this practice yields more than just a record. It creates a quiet, visual narrative of a family’s commitment to saving water. Seeing a week’s worth of raindrop icons collected on a page is far more motivating than reading a tip sheet that has been pinned to the fridge for months. The drawing becomes a daily, personal reminder that small actions, repeated consistently, add up to meaningful change.
So, when you next review your household’s water habits, put down the list and pick up a pencil. By turning conservation into a daily act of drawing, you are not just tracking your usage; you are rewiring your attention. You are embedding the principle of mindful water use into your daily life, one small sketch at a time.
Evoking Emotional Responses for Action
When Day Zero loomed over Cape Town, fear succeeded where a thousand brochures failed. Panic is a ruthless teacher, but you cannot sustain panic for a year. Emotional action needs a different mechanism.
Drawing your water use changes the emotional stakes. The water saving tips drawing method turns a boring list into a personal record. I once watched a neighbour cheer over a sketch of his repaired geyser. That is the point! A visual record makes your effort feel real.
People respond to what they see. A drawing of a half-empty rain tank produces a different response than a graph. It creates urgency, pride, or mild embarrassment. Those feelings push you to act, not merely to remember.
Essential Drawing Techniques for Water-Saving Illustrations
Using Water Drop and Earth Symbolism
When I draw a water drop, I start with the highlight. That single white curve gives the drop its weight. For earth symbolism, I use broken lines to suggest dry soil. This pairing makes your water saving tips drawing feel immediate.
Here is the trick: let the drop hold the Earth. But never fill the entire circle with green. Leave gaps! Use hatching for texture. The viewer’s eye will fill the rest, and that act of completion builds empathy.
- Start with a contour line for the drop
- Add a crescent shadow underneath
- Use stippling for the earth’s cracked surface
These techniques keep the illustration clean. In South Africa, where drought is a daily reality, this drawing style converts abstract data into a felt truth without turning into a lecture.
Mastering Simple Line Art for Clarity
A single unbroken line can carry more meaning than a fully shaded illustration. In water saving tips drawing, clarity begins with economy. I tell beginners to treat every stroke like a drop of water. Waste none. Use a hard pencil to establish the outer edge first. Then walk away. If the contour reads clearly, you have done enough.
Line weight determines what the viewer sees first. Thicker lines near the base mimic gravity. Thinner lines suggest light. For dry riverbeds, try parallel hatching with no crosshatching. The gaps let white space function as water. South African illustrators use this for signage.
- Draw the main shape in one attempt
- Erase only the guide lines, not the contour
- Test the drawing at thumbnail size
Simple line art forces decisions. You cannot hide behind texture. That honesty makes the message trustworthy. This approach respects the viewer’s time.
Choosing a Color Palette for Hydration Themes
Respecting the viewer’s time continues with colour. In water saving tips drawing, a palette of ochre and muted grey performs better than a rainbow. South Africans understand thirst; we do not need a blue wash to feel it.
Begin with the catchment area, not the tap. Draw the soil cracking, then let the white space represent the absent water. I add a single teal stroke only when the message requires relief, not decoration.
- Use a hard pencil for dry ground.
- Use a soft pencil for the lone water line.
- Use no pencil for the sky.
Test the drawing in strong midday light. If the essential gesture survives glare, your palette and line work have earned their place.
Composing Focus for Maximum Impact
The most effective illustration is often an exercise in subtraction. In a country where every litre counts, your artwork can mirror the principle of conservation. Drawing with a dry hand teaches you that a single, deliberate stroke often carries more weight than a dozen hesitant ones. This is the essence of water saving tips drawing: learning to do more with less.
Before you put pencil to paper, consider the surface. A textured cotton paper will grip the graphite differently than a smooth, hot-pressed sheet. This texture becomes your ally, creating a natural dry brush effect that mimics the parched earth of the Karoo. It is not about replicating a photograph, but about capturing the sensation of scarcity. A heavy hand wastes both your energy and the tooth of the paper, so let the medium breathe.
Building a Visual Vocabulary of Scarcity
When constructing your scene, focus on the elements that tell the story of drought without shouting. Think about the weight of a full bucket versus the hollowness of an empty one. The former demands solid, grounded shading; the latter calls for delicate, minimal lines to suggest its interior void.
Here are a few principles to guide your hand:
1. Line Economy: Use a contour line to define a shape, then stop. Do not reinforce it. Trust the viewer’s eye to fill the gap.
2. Negative Space: Let the white of the paper represent the water itself. A river drawn only by its banks is more powerful than one filled with scribbled waves.
3. Tonal Pauses: Allow areas of the drawing to remain untouched. This rest for the eye mirrors the rest the landscape needs from the sun.
These techniques are not just stylistic choices; they are a form of visual literacy. They allow you to communicate the urgency of our water crisis to an audience that already understands the feeling of a dry tap. The viewer does not need to see a leaking pipe to feel the loss.
Your pencil is a tool for measurement, not just mark-making. Observe how far the shadow stretches from a thorn tree. Notice the specific angle of a sagging fence line. This observational discipline translates directly into the confidence of your hand. By restraining your output, you honour the input of the world around you. The resulting image is sharp, focused, and devoid of unnecessary noise. It speaks clearly because it learns to stay silent when the point has been made.
Drawing Step-by-Step for Common Water Saving Habits
Illustrating the Leaky Faucet and Fix
A single dripping tap can waste over 10,000 litres of water each year. That quiet, rhythmic plink is easy to ignore, but translating it into a clear visual is a powerful way to drive the message home. When crafting a water saving tips drawing, the leaky faucet is your most honest subject.
Start by sketching the spout with simple, solid lines to anchor the composition. Then, capture the motion of the water itself. A single droplet mid-fall, followed by a smaller splash below, tells the entire story without a single word.
Follow these steps to illustrate the fix:
1. Draw the faucet base and spout, adding a clean, sharp handle.
2. Sketch a single, elongated droplet falling from the rim.
3. Add a small circular puddle at the base, with a tiny ripple.
4. Erase the falling droplet and replace it with a solid “X” across the handle.
This simple sequence transforms a problem into a solution. It shows exactly how a small action, like tightening a valve, stops the waste. For anyone searching for water saving tips drawing inspiration, this before-and-after approach is clear, memorable, and instantly actionable. The image itself becomes a silent instructor, making the abstract concept of conservation feel tangible.
Depicting Shorter Shower Timers
When you sit down to create a water saving tips drawing, few subjects offer as much instant recognition as the humble shower timer. We all know the feeling of lingering under the hot spray, the minutes slipping away like steam. A step-by-step illustration can turn this ordinary habit into a powerful visual reminder.
To depict a shorter shower, you need a clear focal point. Start by sketching a simple analog timer on a wall tile, its face large and centered. Then, draw a smaller clock next to it, showing the target time. The contrast between the two is where the message lives. The visual narrative is straightforward: a big ring of wasted time versus a small ring of efficiency. This is the core of your water saving tips drawing.
For the surrounding details, you can add a few simple elements that ground the scene in a familiar bathroom setting.
– A single bar of soap, half-used to suggest progress.
– A thin, vertical line of steam rising from the drain, showing warmth without excessive use.
– A small drop of water on the nozzle, hinting at readiness rather than waste.
The final step is to add motion lines around the hands of the smaller timer. This simple stroke suggests urgency and efficiency. By focusing on the iconography of time itself, this illustration communicates instantly. It gives viewers a clear mental model they can carry into their own routine, making the abstract goal of water conservation feel like an achievable, daily visual check-in.
Visualizing Rainwater Harvesting Systems
A water saving tips drawing that captures the scale of rainwater harvesting can be particularly compelling. The visual narrative differs from bathroom fixtures, moving the eye skyward to the source. I find that the most effective images break the house front open, revealing a hidden anatomy of pipes and filters.
The composition demands a vertical read. I sketch a clean cross section of a house wall, splitting the frame between the sky and the underground storage tank. The key is to show the journey: from cloud, to roof, to gutter, and down the downpipe. A clean arrow system can trace the water’s path without cluttering the scene. The tank itself should anchor the lower corner with a heavier line weight. A simple gauge or float bob inside the tank can hint at the storage level, making the system’s capacity feel quantifiable.
To make the schematic feel complete, consider adding these details:
– A wavy line for the downpipe that cuts away to reveal a filter basket.
– A small, dedicated pump unit mounted on the wall beside the tank.
– A single readout panel showing a battery charge, hinting at a pump system.
The final illustration should feel like a reliable schematic. Keep the background sparse to let the water’s path take precedence. This creates a technical clarity that helps viewers grasp a complex system at a glance.
Drawing the Full Load Washing Machine Rule
Most households waste 40 litres per cycle by running half loads. That figure from the Water Research Commission stays with me. I sketch to make the loss tangible.
I begin with a simple rectangle for the washing machine. Then I add a transparent drum and place a load line inside it. Three garments fill the space. The viewer immediately sees the gap between the clothes and the line, which is wasted water.
Step by step:
1. Draw the machine body.
2. Draw the drum with a visible load line.
3. Add three garments below the line.
4. Label the line ‘full load’.
The composition stays minimal. The final water saving tips drawing speaks to habit, not hardware. It asks the viewer to reconsider their own machine without saying a word.
Sketching Smart Garden Watering Methods
In South Africa, a single neglected sprinkler can waste enough water in one afternoon to fill a small swimming pool. That reality drives my pencil when I create a water saving tips drawing for garden irrigation. I start with a simple rectangle for the vegetable bed, then sketch a network of thin lines representing drip emitters. The focus shifts to a small clock-like dial, which signals the watering schedule.
Step by step, the drawing becomes a visual argument for precision:
- Draw the plant rows with short vertical strokes for leaves.
- Add the main supply line from the tap to the bed.
- Place emitter dots every twenty centimetres along the line.
- Sketch a timer beside the tap to show controlled timing.
The composition captures how focused watering uses far less than a broad spray. Each element points to a simple truth: water at the roots, not the air. This water saving tips drawing frames the gardener’s decision at the tap, turning a daily chore into a deliberate pause.
Tools, Media, and Sharing Your Water-Saving Art
Selecting Traditional Sketching Materials
Every water saving tips drawing begins with a choice of weapon. Graphite pencil suits the cautious sketcher, offering erasable lines while you refine the story. Charcoal pushes contrast, making a dry riverbed feel immediate. For outdoor sketching, waterproof fine liners survive unexpected Highveld downpours, and they let you layer ink without smudging.
Consider your surface. Heavy cartridge paper handles repeated rubbing, while textured watercolour paper gives grain that echoes sand and stone. If you prefer digital tools, a tablet with a pressure-sensitive stylus simulates all of these, and it lets you colour without clean-up.
- Graphite for control
- Charcoal for urgency
- Fine liner for permanence
Sharing your art matters as much as making it. Photograph the finished work in natural light, then post it where neighbours gather online. A water saving tips drawing travels further than a hundred typed reminders.
Exploring Digital Drawing Apps and Software
Digital tools expand the reach of water saving tips drawing beyond paper. Apps like Procreate or Krita offer layers that let you test colour combinations without ruining the sketch underneath. For South African artists, load shedding makes autosave essential; set it before you start.
The pressure-sensitive stylus mimics graphite and charcoal, but the undo button grants freedom. Vector software keeps lines crisp for posters, while raster apps handle soft watercolour washes. Each brush engine changes how your mark lands on the canvas.
- Procreate for layering and time-lapse export
- Krita for free painting with robust brush engines
- Adobe Fresco for live watercolour brushes
Sharing digital work is immediate. Post a time-lapse of your water saving tips drawing on WhatsApp or Instagram. A video of a dripping tap turning into a closed valve travels faster than any municipal notice. Load shedding might interrupt your work, but the file stays safe on your device.
Designing Shareable Infographic Posters
The infographic poster turns water saving tips drawing into a public statement. Whether pinned to a community board in Soweto or shared from Cape Town, the format demands clarity. Your composition must survive the glance of someone walking past a library window.
Tools shape the outcome. A fineliner gives precision for technical details like pipe diagrams. Charcoal adds texture for emotional pieces. For reproduction, high contrast black and white works best.
- Use A3 or larger for physical posters
- Test photocopy contrast before printing
- Keep text blocks under ten words
Sharing your work means knowing your audience. WhatsApp groups in South Africa circulate images faster than any municipal notice. A simple tap with a single drop outperforms a cluttered scene. Load shedding forces you to work in bursts, but that constraint often produces sharper water saving tips drawing. This is the honest reality of making water saving tips drawing for a country where every drop counts.

0 Comments